OCR is continually developing and enhancing reports to help you view and analyze your CARES data. To access your reports at any time, click on "Reports" on the left-side menu in CARES, then click the blue "Go to Reports" button. After you click "Go to Reports," a new web browser tab will automatically open and log you in to "TIBCO Jaspersoft" (pictured below), which is the CARES report-processing website. CARES will remain open in your original tab, and you can return to CARES at any time to continue using CARES as usual. It is fine to have the reports tab open at the same time as CARES, but remember not to open any additional tabs of CARES itself (see Avoid Errors and Data Loss).
Running Reports
Reports only display data from CARES; you cannot modify data by running a report. After you update data in CARES, you will also see it updated in new reports you run. Please remember, all CARES reports are only tools to assist you in your practice; keeping and relying on your own records is essential, as CARES data can only reflect the latest entries done by you or your staff. If you ever notice anything not related to data entry that is amiss in a report (or any part of CARES), always reach out to let OCR know right away.

After you click "Go to Reports" in CARES, you are automatically taken to a "Library" screen (shown above) which shows you a list of all of the reports you can run at this time. You can click the word "Library" at the top of the screen at any time to return to a list of all of the reports currently available. The "Name" column shows you the name of the report. The "Description" column gives you information about each report. Click the name of a report to open it.

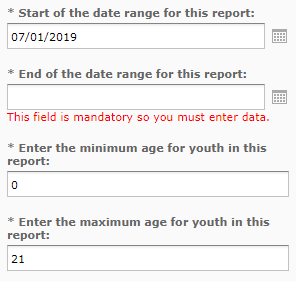
If you see the reminder above to "apply input values," this is because most reports need you to set "Input Controls" (your parameters) before any data is visible. Simply complete the prompts on the left of the screen (demonstrated below). For example, select your name or a date range. After entering at least the required (asterisked) Input Controls, click the blue "Apply" button to view results. If no results or the wrong results appear, double-check all your inputs.
This video shows an overview of a running a report. Individual features are detailed and shown larger below.
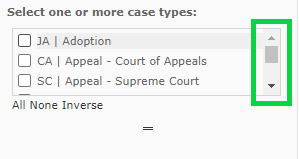
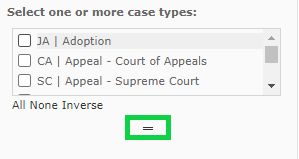
Occasionally you will see saved "Options" at the top left of the input controls—choose one from the drop-down list to auto-populate those settings. If there are several input controls, you may need to scroll up and down on the left side of the screen or even within a set of options to see them all (below left). Expand long lists of options by dragging down the two bars below that list (below right):
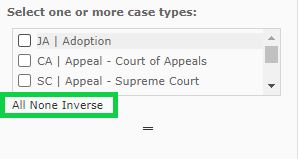
If you want to include all or none of the items in a checkbox list, note the shortcuts to select "All," "None," or "Inverse" (the opposite of what is currently selected) below any checkbox list. (Note that inputting only "None" on some fields would return no data, so the system will default to reporting all of the items if you do so.)
When entering dates, it is easiest to click on the small calendar icon to the right of the date field, then navigate through the calendar to the date you want. You may also type a date, but the date must be formatted as MM/DD/YYYY—the reporting tool will not accept fewer digits, different separators (slashes are required), or an order other than month-day-year.
Working With Results
After your report loads, you have several options to adjust your view and "export" (i.e. save) your results. The first buttons pictured and described below can be found in the upper right of the report screen.
Zoom to Increase Size:
The results always look very small until you zoom in. OCR recommends adjusting the zoom settings as shown in the video above to make the report easy to see on your screen. To adjust your zoom, click the plus and minus buttons to make the report bigger or smaller:

Search Report Contents:
Type any words or terms that appear in the report (such as a case number) into the "search report" box, then click the magnifying glass to start the search. If the word(s) you typed are found, they will be highlighted yellow. Click the right and left triangles next to the word(s) you typed into the “search report” box to navigate among each instance:

Change Pages:
If your results appear on more than one page of a report, use the right and left triangles in the upper right-hand corner of the screen to move between pages. You can also type the page number you want into the "Page" field to jump to it.

Change Inputs:
Update your inputs on the left side of the screen, such as date ranges or case types, then click "Apply" to update the data shown. Sometimes OCR may refer to reports by "fiscal year" instead of calendar year. If you need to look at data by fiscal year, note that the state's fiscal year runs from July 1st to June 30th.
Refresh (Update) Results:
If you update any of your data in CARES while you have a report open, you need to refresh it to see the updated results. Click on the circular arrows icon to refresh your report with the latest data from CARES.

Export and Print Reports:
The buttons pictured and described below can be found in the upper left of the screen. Please note, there is no need to save reports within the reporting screen—clicking the save (disk) icon itself will show an error because the report cannot be modified. If you accidentally click this button, you can simply "close" the error message and move on.
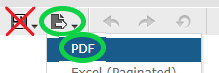
To save or print a copy of your specific results shown, hover over the "Export Results" button pictured above and choose a format (usually PDF, Excel, or CSV). "Export" just means to save the results in another format and/or file on your computer. PDFs are easiest to print, email, and/or save to your device. Excel or CSV can be opened as a spreadsheet to sort or filter as needed. Remember that reports often contain confidential CARES information, so continue to be careful after any export or print.
Log Out of Reports

When you are done using the Jaspersoft tab of your web browser (the CARES report-processing website), "Log Out" in the upper-right of the screen. It is just as important to log out and protect the information in the reports window as it is to protect CARES itself. You will also automatically be logged out after a period of inactivity. To log back in, do not use the Jaspersoft login screen; instead, always access reports via CARES > Reports.